OpenHarmony移植到STM32H743系列-这是一个系列
本篇内容源自 porting-minichip-overview↗ 此参考文档适用于OpenHarmony LTS 3.0.1及之前版本的轻量系统的适配,即对于我现在的5.0.3版本可能会有一定的差别,但是大体上是可以参考的。 和 轻量系统STM32F407芯片移植案例↗ 。
内核移植
内核移植需要完成LiteOS-M Kconfig适配、gn的编译构建和内核启动最小适配。
Kconfig文件适配
创建 board 层结构
cd ~/path/to/openharmony_project
mkdir -p device/board/embfire/
cd device/board/embfire/

# 创建 embfire 下的 Kconfig 入口文件
touch Kconfig.liteos_m.boards
touch Kconfig.liteos_m.defconfig.boards
touch Kconfig.liteos_m.shields

# 创建开发板目录和子文件
mkdir -p challenger_h743v2/liteos_m
cd challenger_h743v2

touch Kconfig.liteos_m.board
touch Kconfig.liteos_m.defconfig.board
touch liteos_m_3.0.0/config.gni
创建 soc 层结构
cd ~/path/to/openharmony_project
mkdir -p device/soc/st
cd device/soc/st

touch Kconfig.liteos_m.defconfig
touch Kconfig.liteos_m.series
touch Kconfig.liteos_m.soc

mkdir -p stm32h7xx
cd stm32h7xx
touch Kconfig.liteos_m.defconfig.series
touch Kconfig.liteos_m.defconfig.stm32h7xx
touch Kconfig.liteos_m.series
touch Kconfig.liteos_m.soc
文件内容模板
device/board/embfire/Kconfig.liteos_m.boards
3 lines
if SOC_STM32H743
    orsource "challenger_h743v2/Kconfig.liteos_m.board"
endif
device/board/embfire/Kconfig.liteos_m.defconfig.boards
1 lines
orsource "*/Kconfig.liteos_m.defconfig.board"
device/board/embfire/Kconfig.liteos_m.shields
1 lines
# 可留空或根据需要添加内容
device/board/embfire/challenger_h743v2/Kconfig.liteos_m.board
3 lines
menuconfig BOARD_CHALLENGER_H743V2
    bool "Select board Challenger H743V2"
    depends on SOC_STM32H743
device/board/embfire/challenger_h743v2/Kconfig.liteos_m.defconfig.board
3 lines
if BOARD_CHALLENGER_H743V2
    # 默认配置选项写在这里
endif
device/board/embfire/challenger_h743v2/liteos_m_3.0.0/config.gni
3 lines
ohos_kernel_type = "liteos_m"
ohos_kernel_version = "3.0.0"
board_name = "challenger_h743v2"
device/soc/st/Kconfig.liteos_m.defconfig
1 lines
rsource "*/Kconfig.liteos_m.defconfig.series"
device/soc/st/Kconfig.liteos_m.series
1 lines
rsource "*/Kconfig.liteos_m.series"
device/soc/st/Kconfig.liteos_m.soc
9 lines
config SOC_COMPANY_STMICROELECTRONICS
    bool

if SOC_COMPANY_STMICROELECTRONICS
config SOC_COMPANY
    string
    default "st"
rsource "*/Kconfig.liteos_m.soc"
endif
device/soc/st/stm32h7xx/Kconfig.liteos_m.series
7 lines
config SOC_SERIES_STM32H7xx
    bool "STMicroelectronics STM32H7xx series"
    select ARCH_ARM
    select SOC_COMPANY_STMICROELECTRONICS
    select CPU_CORTEX_M7
    help
        Enable support for STMicroelectronics STM32H7xx series
device/soc/st/stm32h7xx/Kconfig.liteos_m.soc
8 lines
choice
    prompt "STMicroelectronics STM32H7xx SoC"
    depends on SOC_SERIES_STM32H7xx

config SOC_STM32H743
    bool "SoC STM32H743"

endchoice
device/soc/st/stm32h7xx/Kconfig.liteos_m.defconfig.series
6 lines
if SOC_SERIES_STM32H7xx
rsource "Kconfig.liteos_m.defconfig.stm32h7xx"
config SOC_SERIES
    string
    default "stm32h7xx"
endif
device/soc/st/stm32h7xx/Kconfig.liteos_m.defconfig.stm32h7xx
4 lines
config SOC
    string
    default "stm32h7xx"
    depends on SOC_STM32H743
接下来可以在kernel/liteos_m目录下执行make menuconfig如果执行出错,可能是因为hb env的问题导致,可以查看
安装配置hb
,实际上执行的是其目录下的Makefile,其中使得能够对Platform/SoC Series进行选择。结果将自动保存在$(PRODUCT_PATH)/kernel_configs/debug.config,下次执行make menuconfig时会导出保存的结果。
BUILD.gn文件适配
在kernel/liteos_m/BUILD.gn中,可以看到,通过deps指定了Board和SoC的编译入口:
kernel/liteos_m/BUILD.gn
2 lines
deps += [ "//device/board/$device_company" ]            --- 对应//device/board/talkweb目录。
deps += [ "//device/soc/$LOSCFG_SOC_COMPANY" ]          --- 对应//device/soc/st目录。
在device/board/talkweb/BUILD.gn中,创建并新增内容如下:
device/board/talkweb/BUILD.gn
7 lines
if (ohos_kernel_type == "liteos_m") {
    import("//kernel/liteos_m/liteos.gni")
    module_name = get_path_info(rebase_path("."), "name")
    module_group(module_name) {
        modules = [ "challenger_h743v2" ]
    }
}
在challenger_h743v2目录下创建BUILD.gn,为了方便管理,将目录名作为模块名:
device/board/embfire/challenger_h743v2/BUILD.gn
7 lines
import("//kernel/liteos_m/liteos.gni")
module_name = get_path_info(rebase_path("."), "name")
module_group(module_name) {
    modules = [
        "liteos_m",
    ]
}
将stm32cubemx生成的示例工程Core目录内的文件、startup_stm32h743xx.s启动文件和startup_stm32h743xx_FLASH.ld链接文件拷贝至device/board/embfire/challenger_h743v2/liteos_m/目录下,并在该目录下创建BUILD.gn,添加如下内容:
device/board/talkweb/niobe407/liteos_m/BUILD.gn
26 lines
import("//kernel/liteos_m/liteos.gni")
module_name = get_path_info(rebase_path("."), "name")
kernel_module(module_name) {
    sources = [
        "startup_stm32h743xx.s",
        "Src/main.c",
        "Src/stm32h7xx_hal_msp.c",
        "Src/stm32h7xx_it.c",
        "Src/system_stm32h7xx.c",
    ]
    include_dirs = [
        "Inc",
    ]
}

config("public") {
    ldflags = [
        "-Wl,-T" + rebase_path("STM32H743xx_FLASH.ld"),
        "-Wl,-u_printf_float",
    ]
    libs = [
        "c",
        "m",
        "nosys",
    ]
}
在make menuconfig中配置(Top) → Compat → Choose libc implementation,选择newlibc。
device/soc/st/BUILD.gn
23 lines
import("//kernel/liteos_m/liteos.gni")
module_name = "stm32h7xx_sdk"
kernel_module(module_name) {
  asmflags = board_asmflags
  sources = [
    "stm32h7xx/sdk/Drivers/STM32H7xx_HAL_Driver/Src/stm32h7xx_hal_rcc.c",
    "stm32h7xx/sdk/Drivers/STM32H7xx_HAL_Driver/Src/stm32h7xx_hal_rcc_ex.c",
    "stm32h7xx/sdk/Drivers/STM32H7xx_HAL_Driver/Src/stm32h7xx_hal_gpio.c",
    "stm32h7xx/sdk/Drivers/STM32H7xx_HAL_Driver/Src/stm32h7xx_hal_dma_ex.c",
    "stm32h7xx/sdk/Drivers/STM32H7xx_HAL_Driver/Src/stm32h7xx_hal_dma.c",
    "stm32h7xx/sdk/Drivers/STM32H7xx_HAL_Driver/Src/stm32h7xx_hal_cortex.c",
    "stm32h7xx/sdk/Drivers/STM32H7xx_HAL_Driver/Src/stm32h7xx_hal.c",
    "stm32h7xx/sdk/Drivers/STM32H7xx_HAL_Driver/Src/stm32h7xx_hal_exti.c",
    "stm32h7xx/sdk/Drivers/STM32H7xx_HAL_Driver/Src/stm32h7xx_hal_uart.c",
  ]
}
#指定全局头文件搜索路径
config("public") {
    include_dirs = [
        "stm32h7xx/sdk/Drivers/STM32H7xx_HAL_Driver/Inc",
        "stm32h7xx/sdk/Drivers/CMSIS/Device/ST/STM32H7xx/Include",
    ]
}
config.gni文件适配
在预编译阶段,在device/board/embfire/challenger_h743v2/liteos_m目录下创建了一个config.gni文件,它其实就是gn脚本的头文件,可以理解为工程构建的全局配置文件。主要配置了CPU型号、交叉编译工具链及全局编译、链接参数等重要信息:
device/board/embfire/challenger_h743v2/liteos_m/config.gni
64 lines
# Kernel type, e.g. "linux", "liteos_a", "liteos_m".
kernel_type = "liteos_m"

# Kernel version.
kernel_version = "3.0.0"

# Board CPU type, e.g. "cortex-a7", "riscv32".
board_cpu = "cortex-m7"

# Board arch, e.g.  "armv7-a", "rv32imac".
board_arch = ""

# Toolchain name used for system compiling.
# E.g. gcc-arm-none-eabi, arm-linux-harmonyeabi-gcc, ohos-clang,  riscv32-unknown-elf.
# Note: The default toolchain is "ohos-clang". It's not mandatory if you use the default toolchain.
board_toolchain = "arm-none-eabi-gcc"

use_board_toolchain = true

# The toolchain path installed, it's not mandatory if you have added toolchain path to your ~/.bashrc.
board_toolchain_path = ""

# Compiler prefix.
board_toolchain_prefix = "arm-none-eabi-"

# Compiler type, "gcc" or "clang".
board_toolchain_type = "gcc"

#Debug compiler optimization level options
board_opt_flags = [
    "-mcpu=cortex-m7",   # 指定为 Cortex-M7 架构
    "-mthumb",            # 启用 thumb 指令集
    "-mfpu=fpv5-d16",     # 为 Cortex-M7 使用 fpv5 浮点单元
    "-mfloat-abi=hard",   # 使用硬件浮点运算
]

# Board related common compile flags.
board_cflags = [
    "-Og",
    "-Wall",
    "-fdata-sections",
    "-ffunction-sections",
    "-DSTM32H743xx",
]

board_cflags += board_opt_flags

board_asmflags = [
    "-Og",
    "-Wall",
    "-fdata-sections",
    "-ffunction-sections",
]
board_asmflags += board_opt_flags

board_cxx_flags = board_cflags

board_ld_flags = board_opt_flags

# Board related headfiles search path.
board_include_dirs = [ "//utils/native/lite/include" ]

# Board adapter dir for OHOS components.
board_adapter_dir = ""
内核子系统适配
在vendor/embfire/challenger_h743v2/config.json文件中添加内核子系统及相关配置,如下所示:
vendor/embfire/challenger_h743v2/config.json
21 lines
{
  "product_name": "challenger_h743v2",
  "type": "mini",
  "version": "3.0",
  "device_company": "embfire",
  "board": "challenger_h743v2",
  "kernel_type": "liteos_m",
  "kernel_version": "3.0.0",
  "subsystems": [
    {
          "subsystem": "kernel",
          "components": [
              {
                  "component": "liteos_m"
              }
          ]
      }
  ],
  "product_adapter_dir": "",
  "third_party_dir": "//third_party"
}
在vendor/embfire/challenger_h743v2/BUILD.gn中添加以下内容:
vendor/embfire/challenger_h743v2/BUILD.gn
2 lines
group("challenger_h743v2") {
}
target_config.h文件适配
根据
内核基础适配↗
,liteos_m的完整配置能力及默认配置在kernel/liteos_m/kernel/include/los_config.h定义,该头文件中的配置项可以根据不同的单板进行裁剪配置。
如果针对这些配置项需要进行不同的板级配置,则可将对应的配置项直接定义到对应单板的device/xxxx/target_config.h文件中,其他未定义的配置项,采用los_config.h中的默认值。
device/soc/st/target_config.h
7 lines
#ifndef _TARGET_CONFIG_H
#define _TARGET_CONFIG_H

#define LOSCFG_BASE_CORE_TICK_RESPONSE_MAX                  0xFFFFFFUL
#include "stm32f4xx.h"			//包含了stm32f4平台大量的宏定义。

#endif
编译烧录验证
接下来执行./build.sh --product-name challenger_h743v2 --no-prebuilt-sdk即可进行编译生成OHOS_Image.bin。

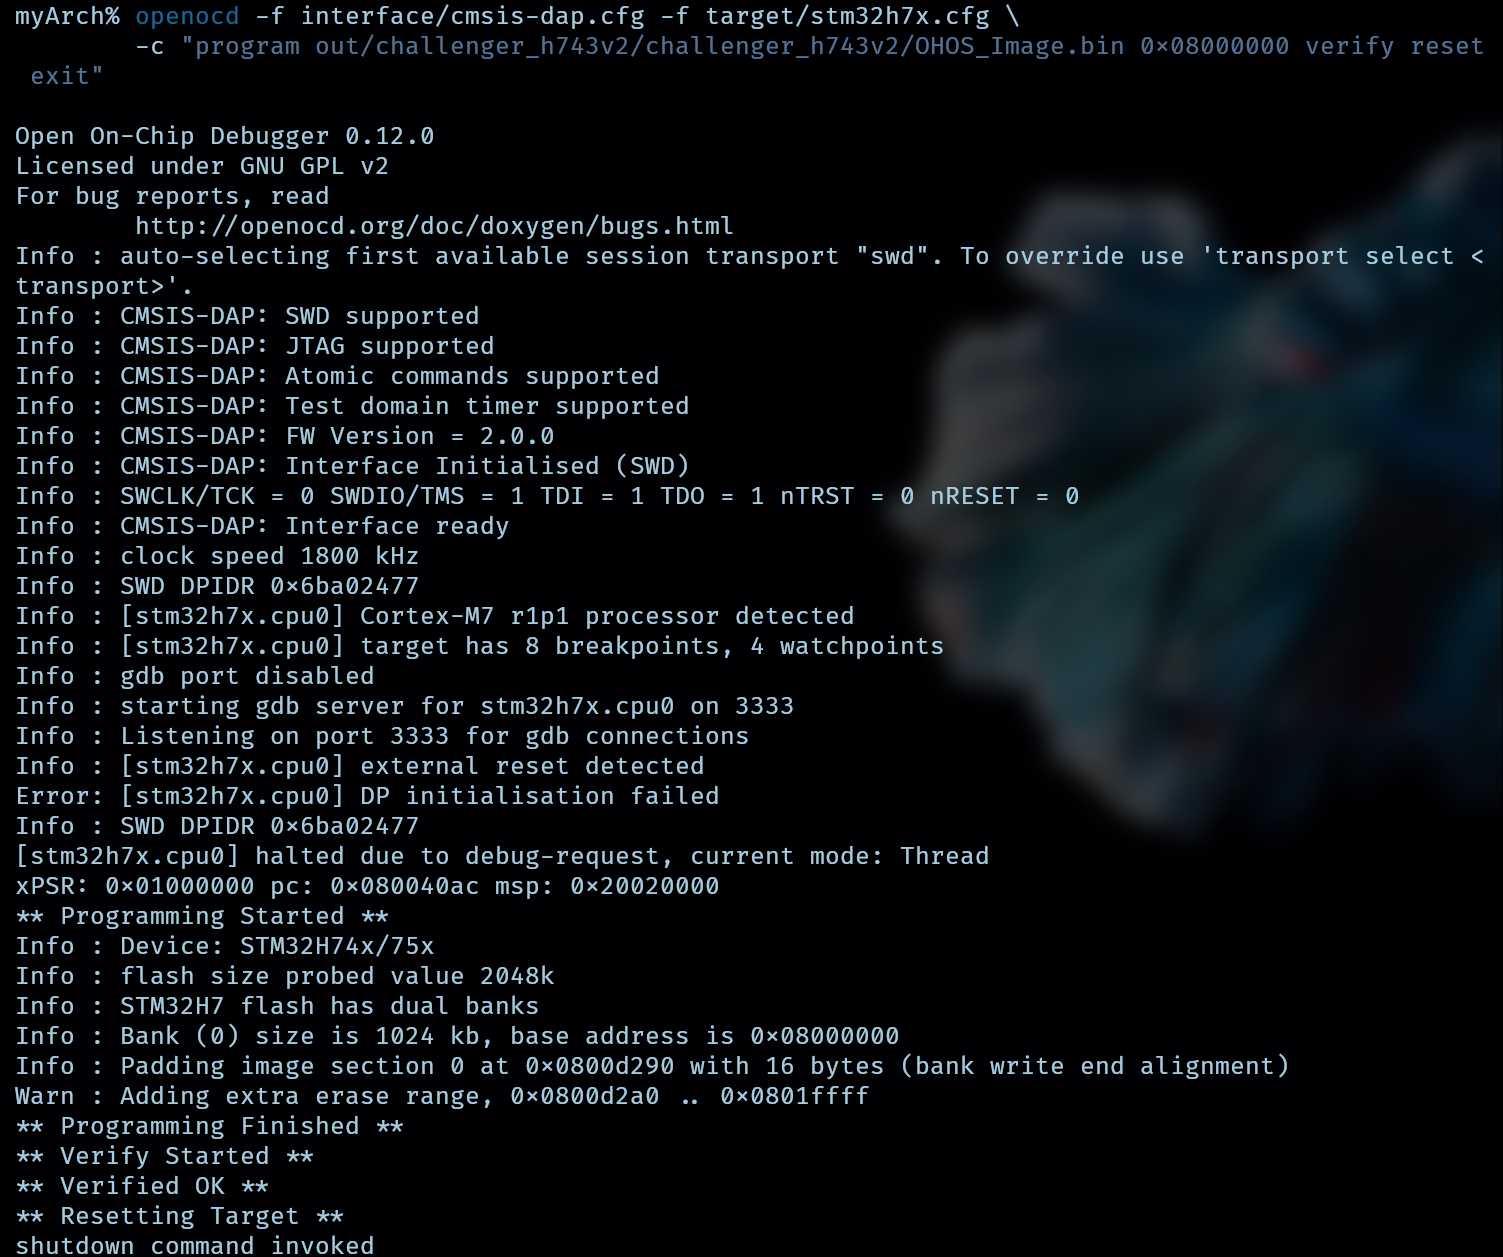
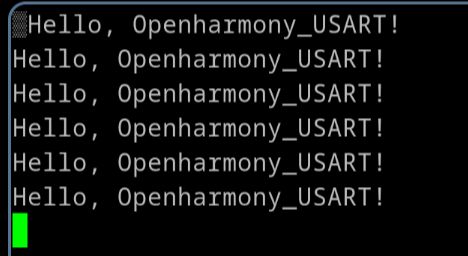
再使用openocd进行镜像的烧录并看到串口输出。


内核启动适配
为liteos_m分配内存,适配内存分配函数
在文件kernel/liteos_m/kernel/src/mm/los_memory.c中,OsMemSystemInit函数通过LOS_MemInit进行了内存初始化。可以看到几个比较关键的宏需要我们指定,我们将其添加到target_config.h中:
device/soc/st/target_config.h
5 lines
extern unsigned int __los_heap_addr_start__;
extern unsigned int __los_heap_addr_end__;
#define LOSCFG_SYS_EXTERNAL_HEAP 1
#define LOSCFG_SYS_HEAP_ADDR ((void *)&__los_heap_addr_start__)
#define LOSCFG_SYS_HEAP_SIZE (((unsigned long)&__los_heap_addr_end__) - ((unsigned long)&__los_heap_addr_start__))
其中,__los_heap_addr_start__与__los_heap_addr_end__变量在STM32F407IGTx_FLASH.ld链接文件中被定义, 将_user_heap_stack花括号内内容修改为:
device/board/embfire/challenger_h743v2/liteos_m/STM32H743XX_FLASH.ld
6 lines
._user_heap_stack :
{
    . = ALIGN(0x40);
    __los_heap_addr_start__ = .;
    __los_heap_addr_end__ = ORIGIN(RAM) + LENGTH(RAM);
} >RAM
除此之外,我们还需要适配内存分配函数,由于内核中已经对_malloc_r等内存分配函数进行了实现,在此我们采用包装函数的方式来适配,用内核中的内存分配函数替换标准库中的内存分配函数即可,在device/board/embfire/challenger_h743v2/liteos_m/config.gni中board_ld_flags链接参数变量修改为:
device/board/embfire/challenger_h743v2/liteos_m/config.gni
11 lines
+board_ld_flags = [
+  "-Wl,--wrap=_calloc_r",
+  "-Wl,--wrap=_malloc_r",
+  "-Wl,--wrap=_realloc_r",
+  "-Wl,--wrap=_reallocf_r",
+  "-Wl,--wrap=_free_r",
+  "-Wl,--wrap=_memalign_r",
+  "-Wl,--wrap=_malloc_usable_size_r",
+]
+board_ld_flags += board_opt_flags
-board_ld_flags = board_opt_flags
适配printf打印
为了方便后续调试,第一步需要先适配printf函数。而printf的函数适配可大可小,在此只做简单适配,具体实现可以参考其它各开发板源码。
在main.c同级目录下创建dprintf.c文件,文件内容如下:
device/board/embfire/challenger_h743v2/liteos_m/Src/dprintf.c
40 lines
#include <stdarg.h>
#include "los_interrupt.h"
#include <stdio.h>

extern UART_HandleTypeDef huart1;

INT32 UartPutc(INT32 ch, VOID *file)
{
    char RL = '\r';
    if (ch =='\n') {
        HAL_UART_Transmit(&huart1, &RL, 1, 0xFFFF);
    }
    return HAL_UART_Transmit(&huart1, (uint8_t *)&ch, 1, 0xFFFF);
}

static void dputs(char const *s, int (*pFputc)(int n, FILE *cookie), void *cookie)
{
    unsigned int intSave;

    intSave = LOS_IntLock();
    while (*s) {
        pFputc(*s++, cookie);
    }
    LOS_IntRestore(intSave);
}

int oh_printf(char const  *fmt, ...)
{
    char buf[1024] = { 0 };
    va_list ap;
    va_start(ap, fmt);
    int len = vsnprintf_s(buf, sizeof(buf), 1024 - 1, fmt, ap);
    va_end(ap);
    if (len > 0) {
        dputs(buf, UartPutc, 0);
    } else {
        dputs("printf error!\n", UartPutc, 0);
    }
    return len;
}
printf换个名字,因为会和标准库中的printf冲突导致编译报错。同时为了调用这个函数,编写一个
h文件。device/board/embfire/challenger_h743v2/liteos_m/Inc/dprintf.h
8 lines
#ifndef DPRINTF_H
#define DPRINTF_H

#include <stdio.h>

int oh_dprintf(const char *fmt, ...);

#endif /* DPRINTF_H */
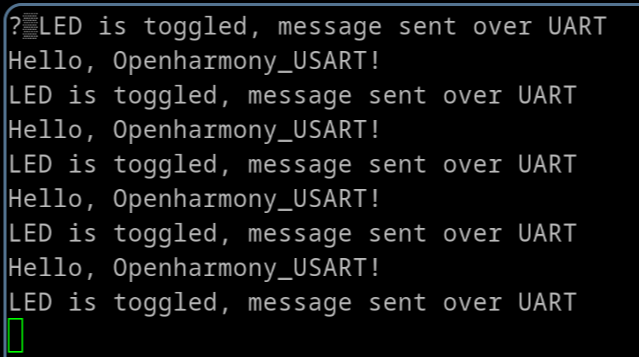
我们现在可以将我们编写的oh_printf函数加入到主函数中测试:
device/board/embfire/challenger_h743v2/liteos_m/Src/main.c
13 lines
/* Includes ------------------------------------------------------------------*/
#include "main.h"
#include <stdio.h>
+#include "dprintf.h"  // 引入 dprintf 的头文件
/* Private includes ----------------------------------------------------------*/

int main(void)
//初始化代码
while(1)
{
+    HAL_Delay(1000);
+    oh_dprintf("LED is toggled, message sent over UART\n");
}
将dprintf.c文件加入BUILD.gn编译脚本,参与编译。
device/board/embfire/challenger_h743v2/liteos_m/BUILD.gn
5 lines
kernel_module(module_name) {
    sources = [
+        "Src/dprintf.c",
    ]
}
在串口初始化之后使用oh_printf函数打印,测试是否适配成功。
